


Sharing visual content across social networks is one of the most effective ways to maintain personal connections and drive brand engagement. Understanding how to upload a photo to facebook smoothly ensures your images retain their crisp resolution and reach the exact audience you intend. At Good Review Service, we know that an active, high-quality media presence directly supports your digital authority and public trust. This definitive 2026 master guide breaks down the step-by-step process for both mobile and desktop interfaces, helping you avoid common compression traps and technical upload errors.
How to Upload a Photo to Facebook on Mobile
Executing a media upload via the official smartphone application is the fastest way to share real-time moments. The mobile interface is highly optimized for rapid data rendering directly from your device’s native storage.
1.Launch the Facebook app on your iOS or Android device by tapping its icon
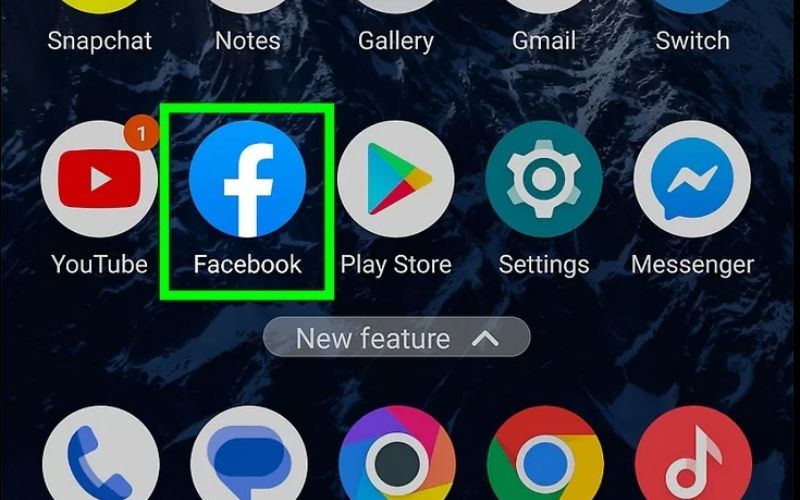
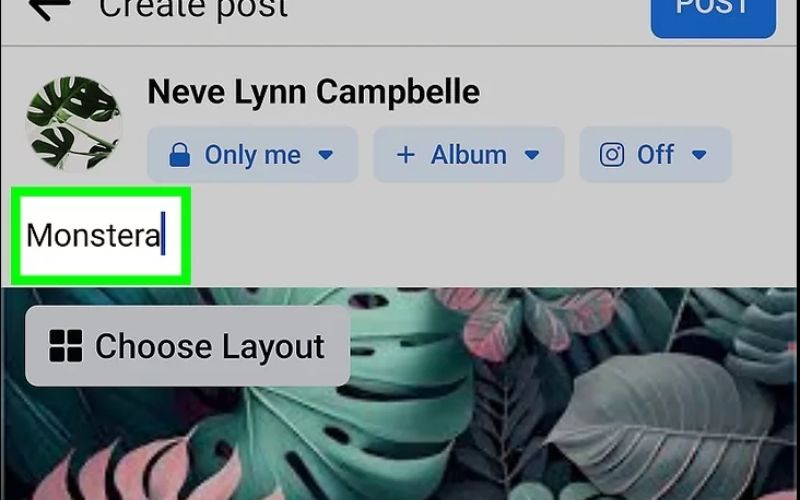
2.Tap the prominent text input field at the top of your main News Feed labeled “What’s on your mind?” to launch the post-creation workspace
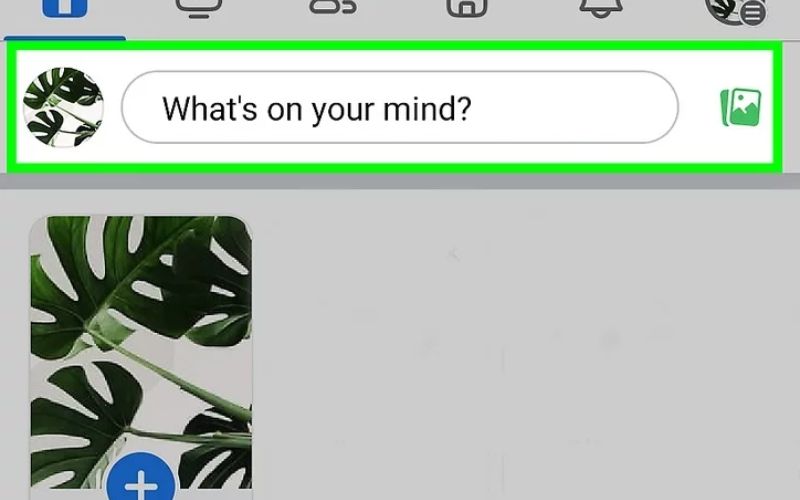
3.Tap the green Photo/Video icon located right below the text window to access your phone’s local media storage

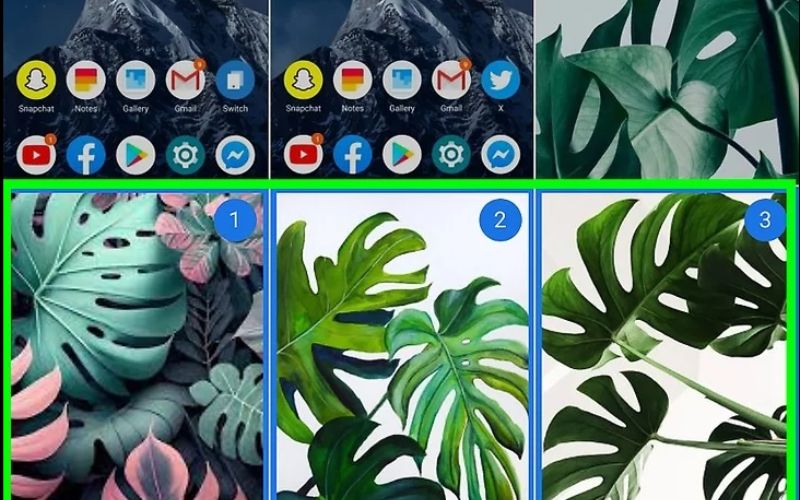
4.Tap the “Select Multiple” button and tap up to 80 photos to select them in the exact sequential order you want them to appear
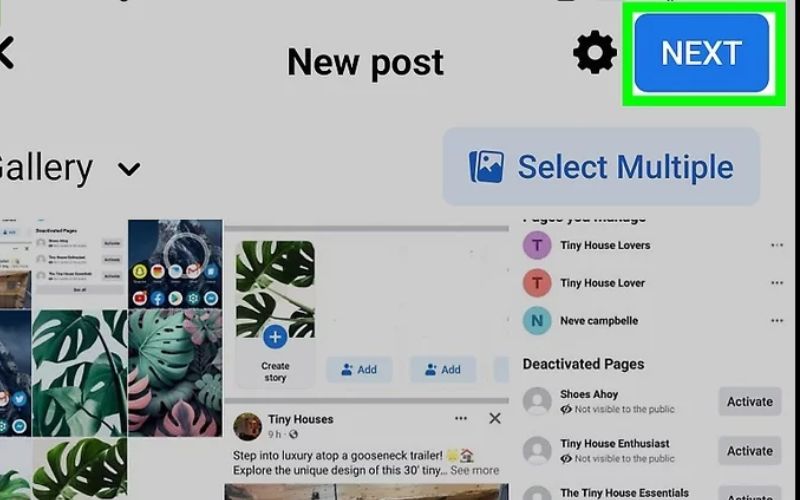
5.Tap the “NEXT” button in the upper-right corner once you have finished selecting your images
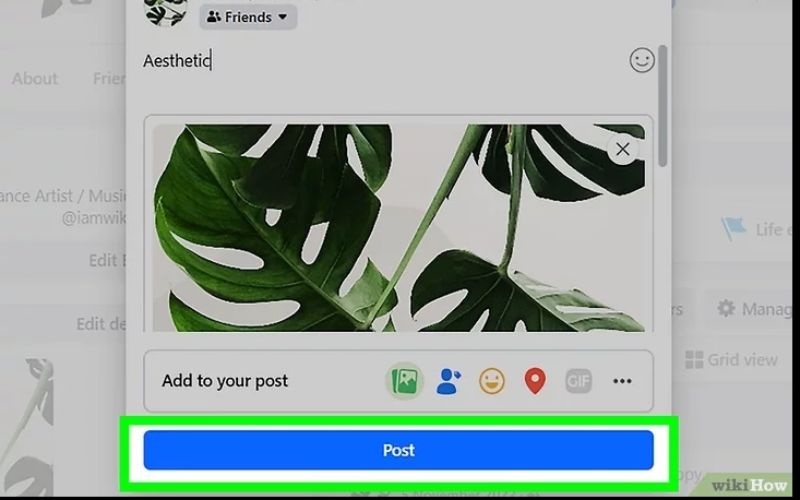
6.Write your accompanying text description or tag relevant location entities in the input field
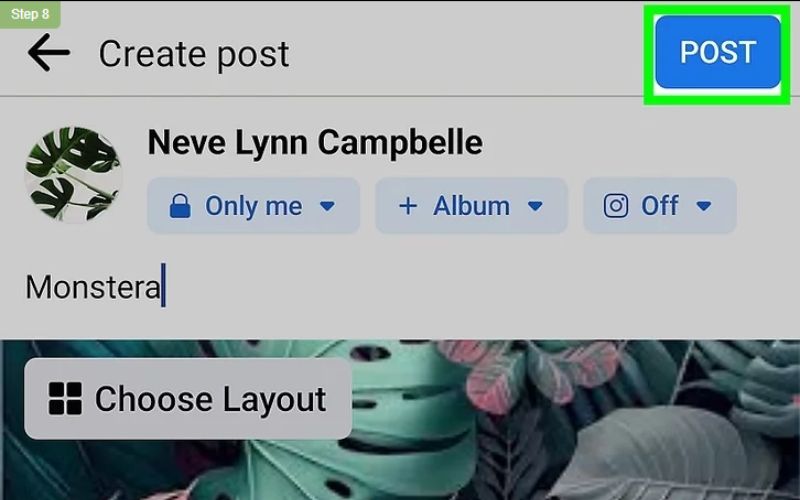
7.Tap the blue “POST” button in the top right to push your photos live to the platform’s servers
How to Upload a Photo to Facebook on Desktop
Utilizing a standard web browser on a laptop or desktop computer provides an expanded, professional dashboard layout that makes managing high-resolution files and organizing complex media files incredibly straightforward.
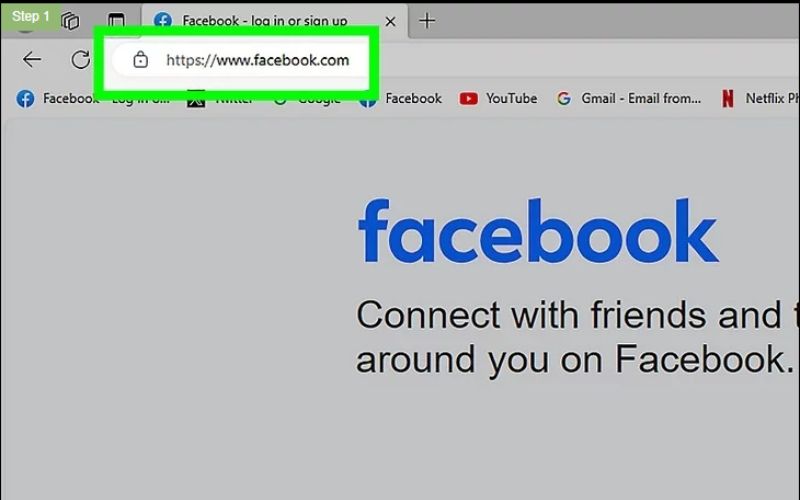
1.Open your preferred web browser and log into the official Facebook site by entering the URL
2.Click the green “Photo/video” icon block to expand the desktop content creation module and trigger your computer’s local file explorer

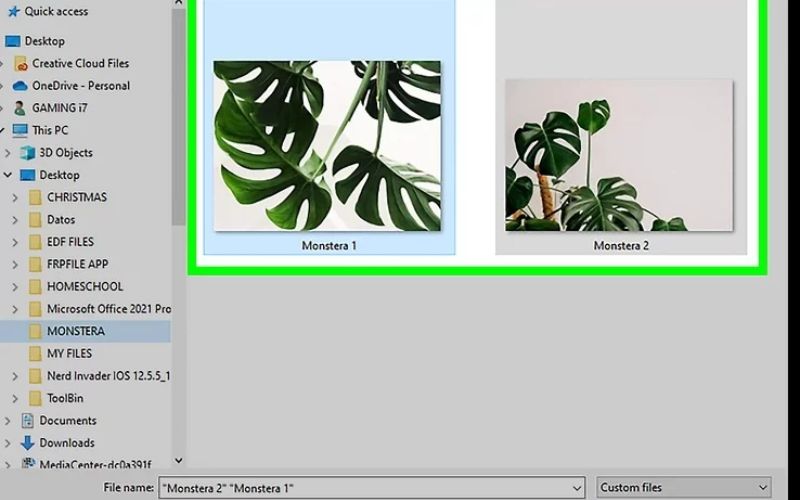
3.Navigate through your hard drive folders, click your target image assets, and hit Open to render a preview
4.Input your text copy, formatting, or hashtags into the post publisher box

5.Click the prominent blue “Post” button at the base of the window to distribute the assets across the network
How to Upload Photos to a Facebook Album
Grouping your visual content into categorized folders prevents your profile timeline from becoming unorganized, preserves image context, and makes it simple for profile visitors to browse historical media collections.
The Mobile App Method
1.Head directly to your personal timeline by tapping your profile
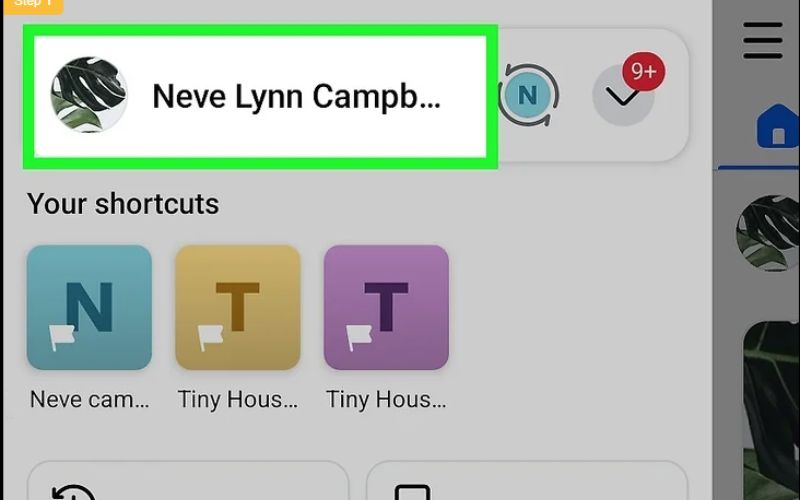
2.Scroll down past your basic bio details and tap the “Photos” menu button
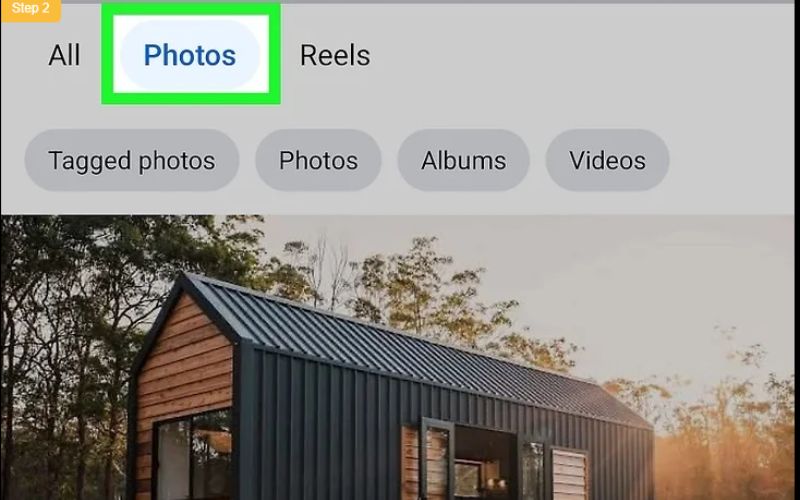
3.Look at the top horizontal menu bar and switch to the “Albums” tab

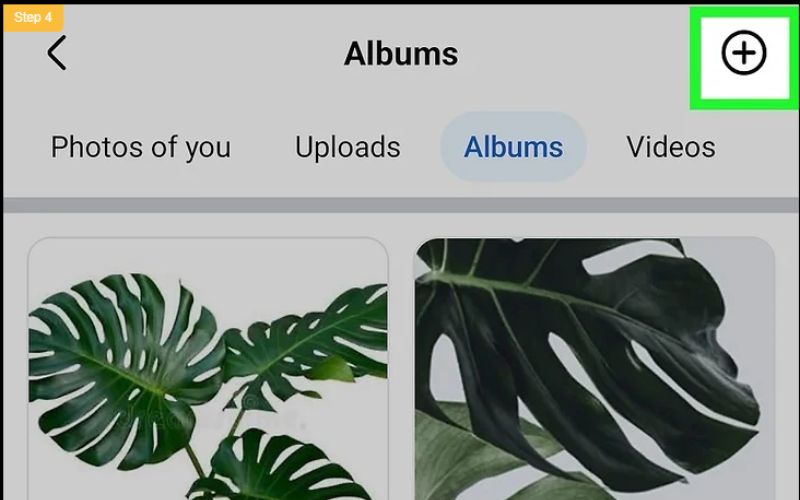
4.Tap the “Create Album” box, which is indicated by a plus symbol
5.Give your folder a clear, descriptive title and add an optional description
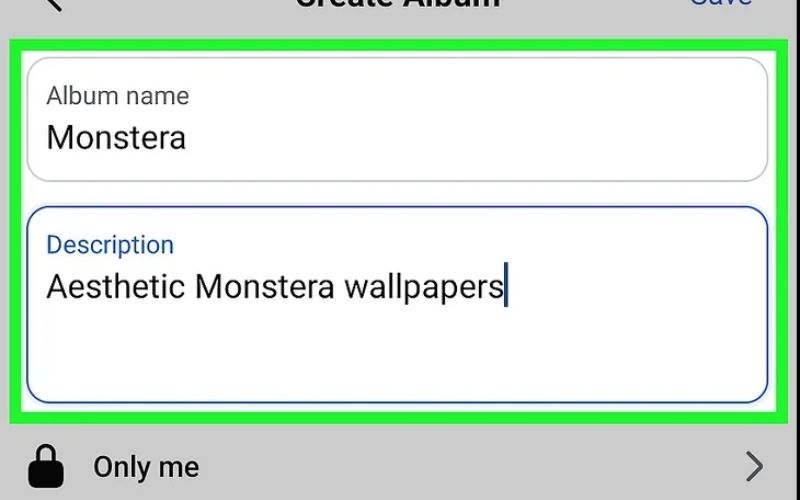
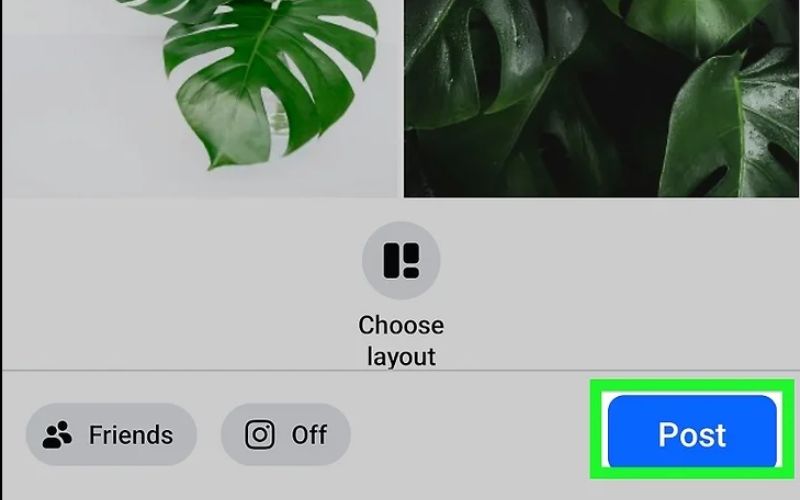
6.Choose your audience to restrict who can see the media, such as setting it to “Friends”

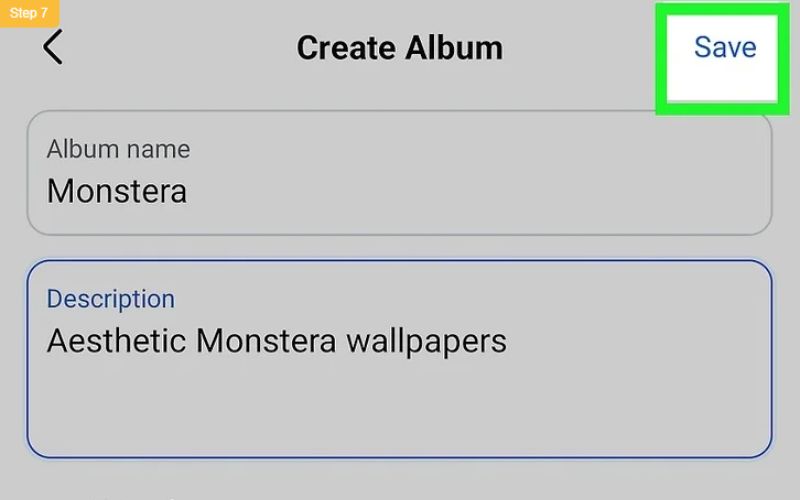
7.Tap the “Save” button to render the empty album folder
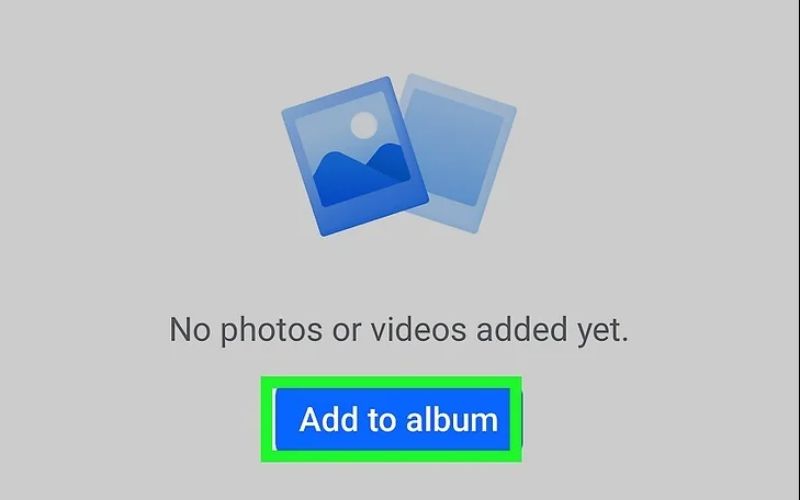
8.Tap the prominent “Add to album” (or Add Photos/Videos) link to batch-upload images directly into that specific folder
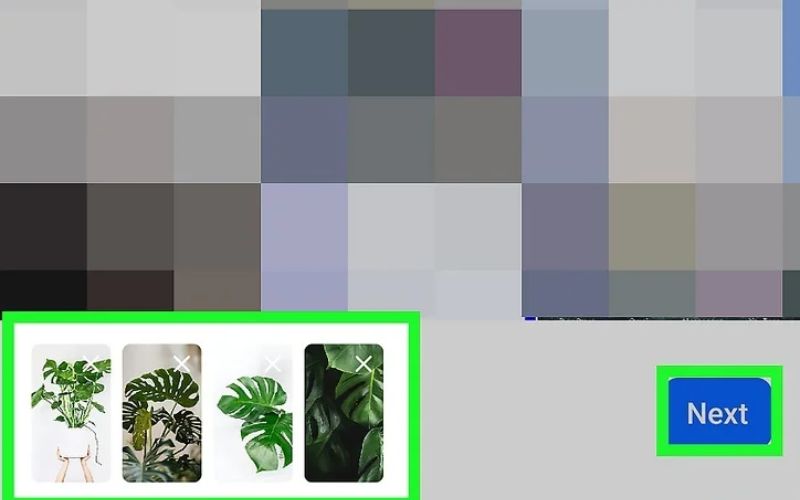
9.Select the desired images from your device’s media gallery and tap “Next”
10.Choose a layout if desired and tap the blue “Post” button to finalize the upload
The Desktop Browser Method
- Navigate to the Facebook website using your desktop browser
- Go to your main timeline page and click on the “Photos” link sitting underneath your main header cover banner
- Click the “Albums” option located on the secondary link bar
- Click the large card labeled “Create Album”
- On the main right-hand panel, click the “Upload photos or videos” button to select files from your computer
- Type your new folder name into the designated field on the left sidebar
- Configure your default privacy levels to select the audience for your album
- Type unique image captions, drag-and-drop the tiles to re-arrange the visual sequence, and click the blue “Post” (or Save) button
- Click the menu icon (three dots) on your published album to access management options, such as editing the album’s cover photo
How to Upload Photos to a Facebook Page
Method 1: Upload Photos Directly on Your Facebook Page
- Log into your Facebook account.
- Click your profile picture in the top-right corner and select the Facebook Page you want to manage.
- Once you switch to the Page, click Photo/Video from the post creation box.
- Select the photos you want to upload from your computer or mobile device.
- Add a caption, tags, or location if needed.
- Click Post to publish the photos on your Facebook Page.
Method 2: Upload Photos Using Meta Business Suite
- Open Meta Business Suite and choose your Facebook Page.
- Click Create Post from the dashboard.
- Select Add Photos/Videos and upload your images.
- Write a caption and customize your post.
- Optionally schedule the post for a later time.
- Click Publish or Schedule.
Photo Upload Settings You Should Know
Configuring your internal settings before pressing publish ensures your personal data remains secure and your visibility matches your specific sharing goals.
Privacy Settings Before Posting
Every individual piece of content you distribute can be fine-tuned to restrict who can see it. Before finalizing your upload, always look at the small privacy drop-down button located directly beneath your profile name.
Choosing Audience
Clicking that selector expands your core audience distribution parameters. You can set the boundary to:
- Public: Visible to absolutely anyone on or off the platform, including search engine index crawlers.
- Friends: Restricted exclusively to your approved, mutual connection network.
- Friends except…: Allows you to select specific individuals from your list who will be completely blocked from seeing the media file on their feeds.
- Only me: Encrypts the post within a private cloud layout, making it completely invisible to the public.
Tagging People and Adding Captions
Click the small tag icon (resembling a price tag) and click directly on a face or object within your photo preview layout. Type your friend’s name to anchor a direct link to their personal timeline, which automatically pushes the image out to their network of connections. Always combine tags with descriptive caption copy that uses natural line breaks to make your text highly scannable and easy to digest.
Why Your Photo May Not Upload on Facebook
It can be incredibly frustrating when a file transfer stalls or fails completely. This issue typically traces back to a few specific technical bottlenecks.
Unsupported File Formats or Size Issues
If you try to inject raw, uncompressed photography files (like .RAW, .TIFF, or .CR2) or obscure graphic design extensions into the status box, the web framework will reject the transfer. The code is built to process standard extensions like JPEG, PNG, WebP, and BMP. Additionally, massive individual files exceeding 15MB can trigger automatic server timeout errors during processing.
Slow Internet or Upload Errors
A fluctuating mobile data connection, an active VPN masking your network location, or a weak Wi-Fi signal will cause severe packet loss during data transmission. This network disruption causes the upload progress bar to freeze indefinitely. To fix this, try cycling your phone’s airplane mode to reset your cellular tower connection, disable your proxy blocks, or switch over to a stable broadband line before re-attempting the transfer.
App Permission Problems on Mobile
If you recently performed an operating system update on your iOS or Android smartphone, your device’s core security configurations might have blocked the application’s storage access privileges. To resolve this, navigate into your phone’s main Settings app, scroll down to the application manager tab, select Facebook, tap Permissions (or Photos on iPhone), and verify that media access is explicitly set to “Always Allow All Photos”.
Facebook Temporary Bugs or Restrictions
Occasionally, global server outages or internal database script errors can cause posting services to stall globally. Furthermore, if your profile has recently distributed an unusual volume of content within a short window, automated spam prevention systems may trigger a temporary feature block, restricting your account’s media upload capabilities for 24 to 48 hours.
Tips to Upload Better Photos on Facebook
To ensure your images look professional and capture maximum user attention, you must design your files to complement the platform’s processing guidelines.
Recommended Image Sizes for Best Quality
To prevent the platform’s automated rendering engines from awkwardly stretching, cropping, or pixelating your visual content, export your media assets using these exact target dimensions:
| Post Layout Style | Optimal Export Dimensions (Pixels) | Aspect Ratio |
| Standard Timeline Feed | 1200 x 630 | 1.91:1 |
| Square Image Graphics | 1200 x 1200 | 1:1 |
| Stories / Vertical Reels | 1080 x 1920 | 9:16 |
| Main Header Cover Banner | 851 x 315 | 2.7:1 |
Avoiding Image Compression Issues
The platform employs heavy automated compression algorithms to save server storage space, which can drastically lower your image sharpness. To bypass this destruction of image quality, always export and save your final files in high-quality PNG format or optimize your JPEGs to a maximum width of 2048 pixels before beginning the upload sequence.
Improving Engagement With Captions and Tags
Algorithms naturally reward content that generates active conversation. Write clear, line-broken captions that pose an engaging question to your audience. Tagging relevant location entities and creative collaborators expands your overall organic reach across external search feeds.
>>> Learn more: How to Advertise Your Business for Free: 15 Proven Ways to Get Customers in 2026
Conclusion
Learning the technical steps of how to upload a photo to facebook on both desktop and mobile layouts allows you to maintain absolute control over your digital media distribution. By selecting optimal dimensions, utilizing clean file extensions, and configuring precise privacy parameters, you ensure your visual storefront remains polished, professional, and engaging.
However, displaying an elegant visual gallery is only half the battle. To truly dominate your market vertical, your brand must support its aesthetic presentation with undisputed public confidence.
Don’t let a missing social proof stream limit your real growth potential. Contact Good Review Service Today to explore how our specialized reputation engineering can support your social media marketing strategy. Let us help you align your live public feedback with your professional visuals to turn everyday internet browsing into lifelong business success!